VI.2.2. Outdoor orientation
It means the position of a person in relation to plants, artificial constructions, relief, designated on a map. It means simply we want to know where we are in a certain place. The next step is planning further how to reach the next goal. In order to do this we have to choose the optimal route.
In case we are in a familiar place, or region, then it is easy to find our way with the help of a map. Comparing the familiar points of the map with their real-life counterparts around us we can identify our own position and determine the direction where to go.
Compass
In unfamiliar places it is recommendable to use a compass. The magnetic needle is in a fluid in order to avoid oscillation. The red part of the needle marks North. Around the rim we can see the four directions and the degrees. .
When not to use a compass?
- When there is no liquid in it. In this case it does not work properly.
- When you can see air bubbles in it. It does not work properly either.
- If it is not transparent.
- The best is to buy one with engraved signs on it. It is more durable than the ones with stickers signalling the directions.
The picture below illustrates how the compass works.
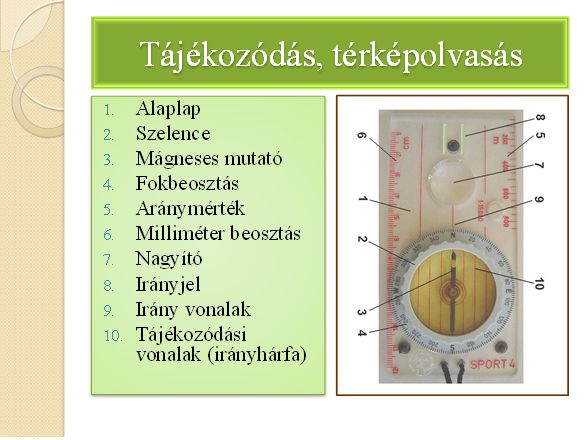
Figure 3.Orientation with compass (own source)
Orientation, map reading, base, casket, magnetic needle, degrees, proportion, mm, magnifier, direction mark, orientation lines (orientation harp)
Maps
A map is a symbolic depiction highlighting relationships between elements of some space, such as objects, regions, phenomena and themes. It is a generalized, proportionately reduced depiction .” (Dosek, 1997. p. 159. ).
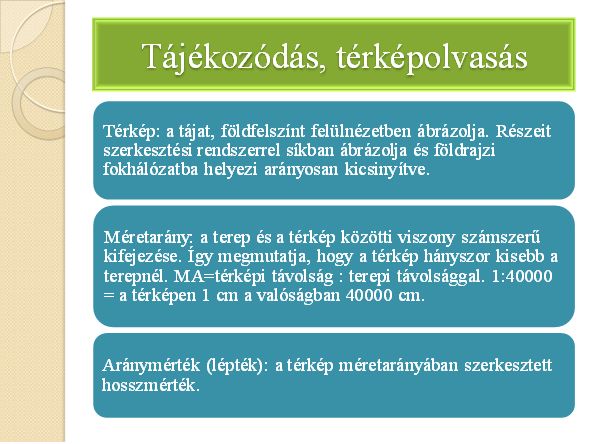
Figure 4. Map reading. (own source)
A map depicts a landscape or an object from above. Its parts are drawn in plane, proportionately reduced. Scale relations: a number that expresses the relationship between the map and real -life objects. MA= distance in the map. 1:40000 means that 1 centimetre in the map is 40000 centimetres in real life. Scale: a measurement of length.
Generalization in the map means that real-life objects, buildings, plants, high-voltage lines are simplified, due to the reduction of their size. Certain objects are not depicted in the map at all, while some others are magnified. These changes make orientation easier for hikers. (Dosek, 1997).
The types of generalization are as follows: (Dosek, 1997):
- simplification: only the shape/outline of an object is kept .
- magnification: it takes place when the object has a great significance for map users. Its image gets magnified in comparison with the images of other objects.
- displacement: it is the result of magnification. For example, if a road gets magnified, the buildings next to it are displaced.
- concentration: if, due to the scale the size of an object is too small to depict. E.g. vineyards, wooded area.
- categorization: these objects are similar regarding their function and characteristics, but they differ considering their size and looks. For example, churches, caves, lookout towers.
- selection: the more typical and informative object is depicted if there are many similar ones in the vicinity. For example: dirt roads, bungalows etc.
- emphasis: is used when there are many similar objects and the more important ones are emphasized by colour or thickness. E.g. main roads.
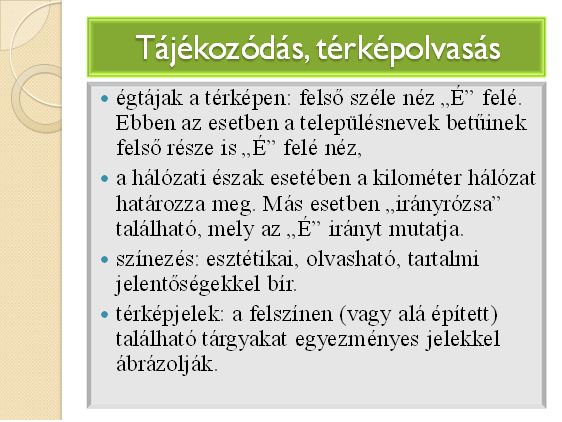
Figure 5. Orientation (own source)
Directions in the map. The (visual) top edges of maps usually correspond to the northern edge of the area represented. The top areas of letters of a settlement’s name also correspond to the north. In other cases there is a ’compass rose’ indication the north. Colouring: it has an aesthetic significance. Makes the text readable, but also has other meanings. Map symbols: objects on the earth’s surface (sometimes underground) are depicted using map signs.
Relief
Configurations of the terrain are depicted with the help of contour lines. Conour lines are a common method used to denote elevation and altitude and depth on maps.(Dosek, 1997). Contour lines do not cross each other. The closer they are to each other the steeper the terrain is. If contour lines are more distant from each other, the terrain is hilly.
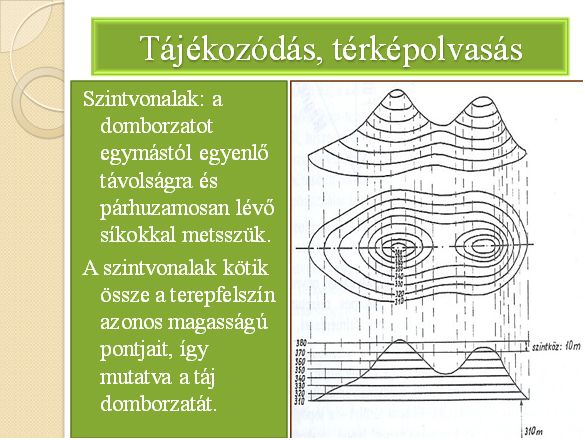
Figure 6. Contour lines 1. (Own source)
The terrain also has different colours. (From orange to brown). The slide below offers a summary of the most siginicant features of contour lines and the terrain.
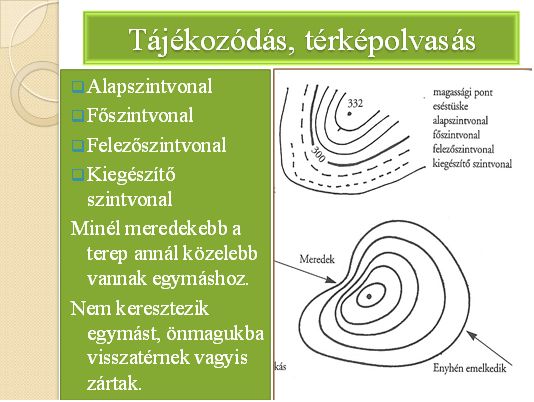
Figure 7. Contour lines 2. (own source)
Basic contour line, main contour line, bisecting contour line, complementary contour line,. The steeper the terrain is the closer they are to each other. They do not cross each other.
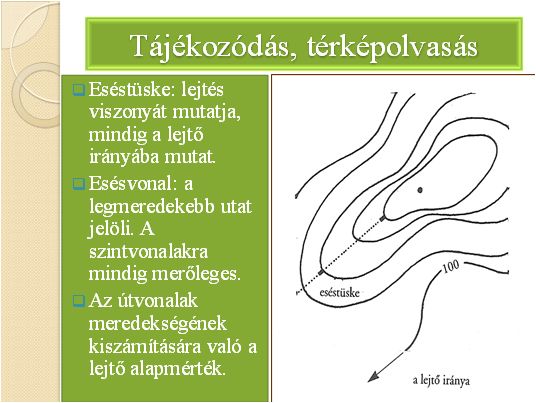
Figure 8.Line of descend (own source)
Line of descend shows the direction of the slope. There is a line to indicate the steepest part of the slope. It is perpendiucular to the contour lines. With the help of these lines the steepness of trails can be calculated.
Map orientation with compass
If we use a compass it is very simple to find out our place. It is a very useful function. Magnetism is permanent, except for the situation when we are under high voltage lines, or, we have metal tools with us. If we get lost, or run into unfamiliar objects, it is advisable to use our compass for map orientation.
The slide below summarizes the individual steps.
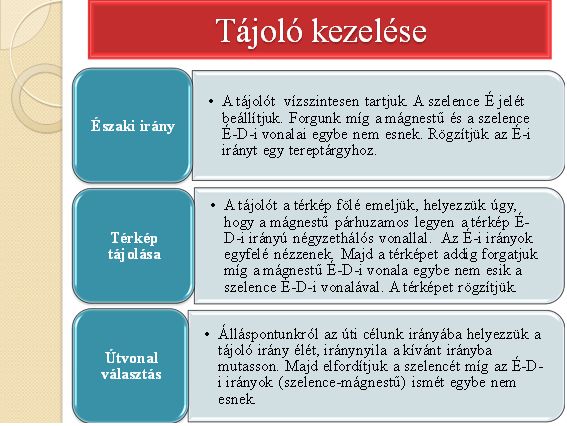
Figure 9. Using the compass (own source)
Finding the north. The compass is held horizontally. We find the mark ’north’ on it. We turn until the magnetic needle and the north-south line of the casket overlap. Map orientation. The compass is held above the map. The magnetic needle needs to be parallel with the North-south line of the map. The north directions overlap. Then the map is rotated until the north-south line of the magnetic needle overlaps with the north-south line of the casket. The map is fixed in this position.
Selecting a route. The edge of the compass is to point to our destination. Then the casket is turned until the north-south directions of the magnetic needle and of the casket overlap.
In a situation when we do not know exactly where we are, then two or three objects have to be identified and we can perform cut-back on the map.
Steps of cutting back.
A clearly visible object has to be identified which can be found on the map, too and we identify its position using the compass.
- the compass is held at eye level, and turn the casket until it is parallel with the compass. Make it sure that the two north directions overlap.
- we get a directional angle and it needs to be drawn on the map. It is important to draw a straight line.
- Repeat the procedure (The best is to perform the procedure three times).
- the point of intersection of the three lines is our position.
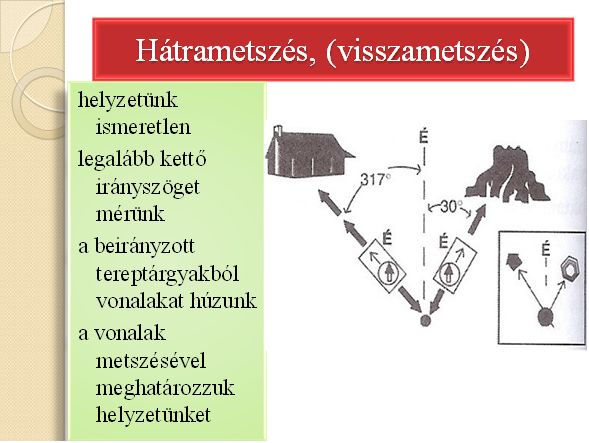
Figure 10. Cut back.(own source)
Position unknown. We measure at least two directional angles. Draw a line from the objects. The point of intersection denotes our position.